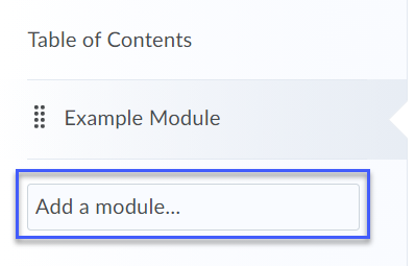
Enter a Name for the module, then press the Enter Key on your keyboard.
BEST PRACTICES:
Create a Start Here module to house key course items, such as the syllabus, course schedule, and other critical items that students should be aware of when starting a course.
Instructors should make sure that Module and Topic titles are clearly labeled and easily identifiable.
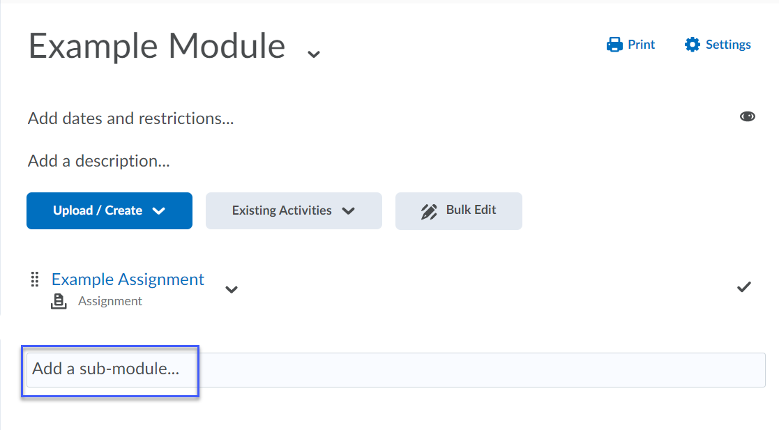
To Create a New Sub-Module:
From the Table of Contents, within Content, select an existing Module.
Select Add a Sub-Module.
Enter a Name for the sub-module, then press the Enter Key on your keyboard.
NOTE: The sub-module will appear within the original module and have its own drop zone for adding content. The sub-module will also appear in the Table of Contents.
Managing Content Modules:
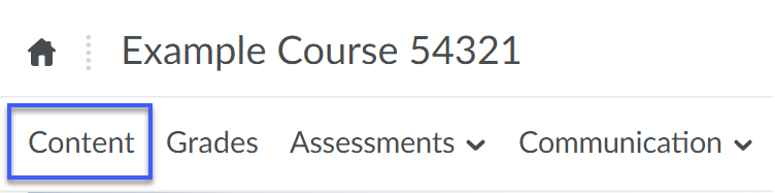
Select Content.
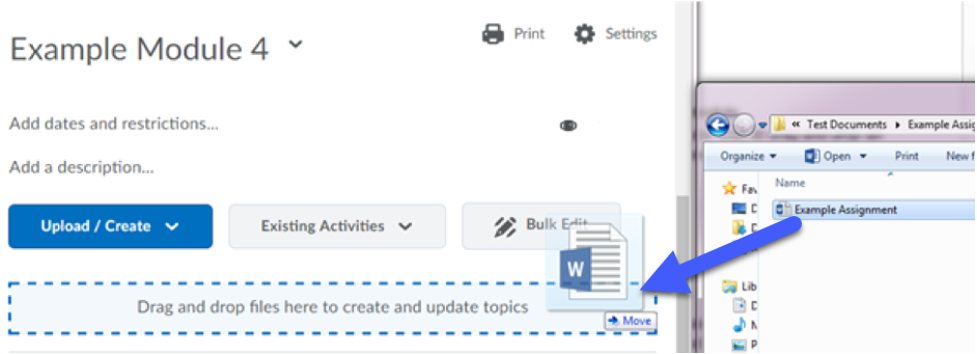
Select the module that you wish to add files to.
From your desktop, locate the file that you wish add to the module.
Note: You are able to drag and drop files but not folders. If you wish to drag and drop an entire folder, select each file (multiple files can be selected at one time) or create a zip file to drag and drop into D2L.
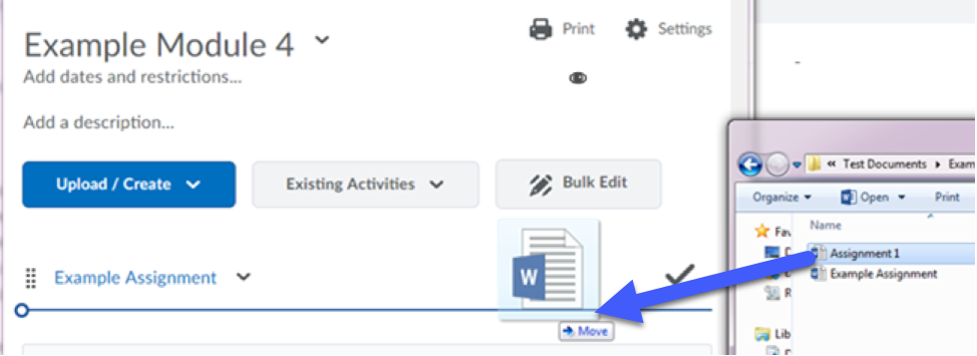
Arrange your desktop to display both the file(s) and D2L.
Left-click on the file with your mouse and continue to hold the mouse button. Drag the file to the drop zone in D2L and release the mouse button. This will upload the file as a topic within the module.
Note: If there is already content within the module, the drop zone will disappear. Instructors can still drag and drop content directly in line with the existing content without use of the drop zone.
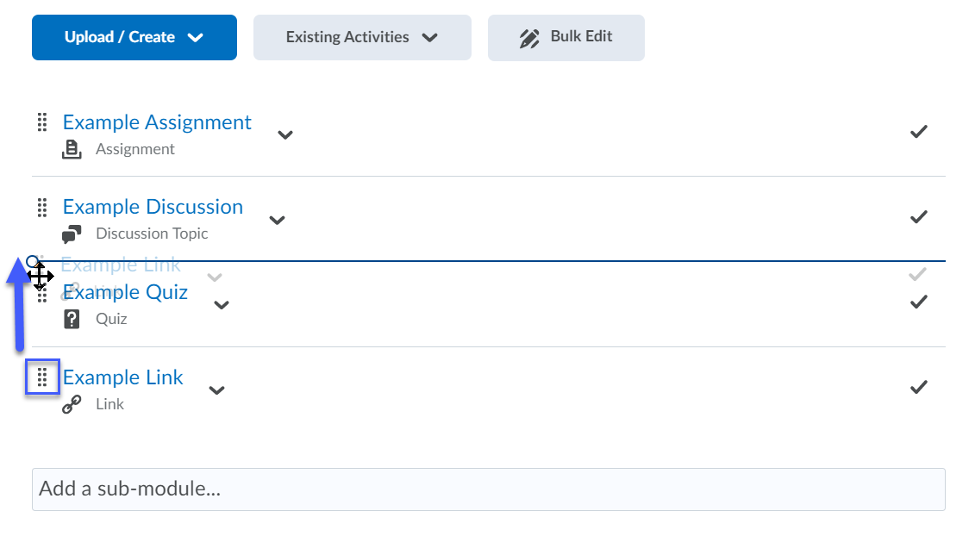
Reordering: Content topics and modules can be reordered by dragging an item up or down until it is in the desired location. Left-click and hold the drag handle (three horizontal lines). Drag the item up or down until you’ve reached the desired location. Release the drag handle.
Moving: Content topics and modules can be moved from one module to another by dragging an item to the desired location. Within the open module, left-click and hold the drag handle (three horizontal lines). Drag the item to another module in the Table of Contents. Release the drag handle.
To delete content, select the module that you wish to delete.
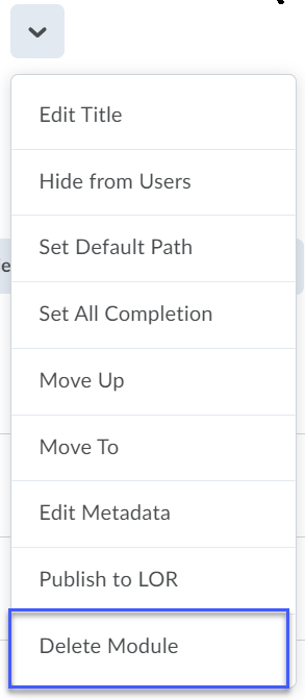
Select the drop-down menu to the right of the module title.
Select Delete Module.
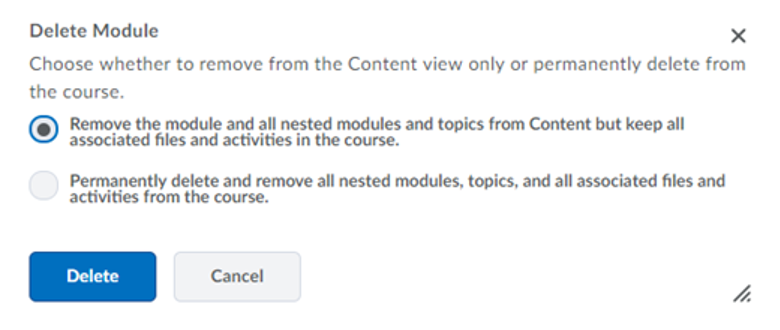
Choose between the two options for deleting a module.
Note: With both options, all sub-modules (nested modules associated with the module will also be deleted).
Select Delete.
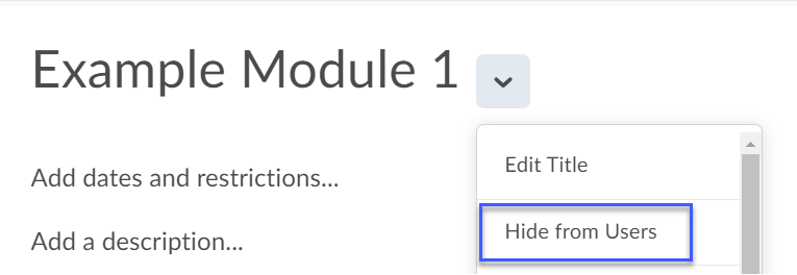
To hide a content module, repeat steps 1 and 2 of Managing Content Modules.
Select Hide from Users.
Editing Content Modules:
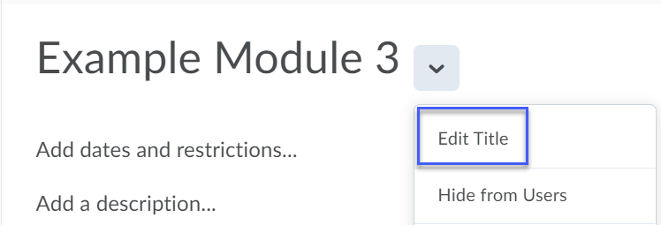
In content, select a module from the Table of Contents.
Select the drop-down menu to the right of the module title.
Select Edit Title.
Enter a new title for the module.
Click anywhere outside of the title field with your mouse to save the new title.


 Note: If there is already content within the module, the drop zone will disappear. Instructors can still drag and drop content directly in line with the existing content without use of the drop zone.