
Course Size Management
Viewing the size of a course in D2L
Instructors are able to see the size of their course(s) by viewing the Course Size Limit widget at the bottom of the homepage of their D2L course(s) if they are using the default home page.

Best practices for maintaining manageable course sizes
Completely Delete Files from a Course
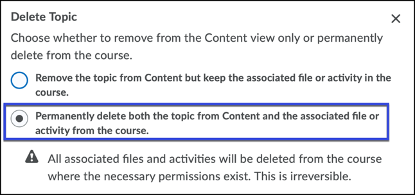
When deleting files from the Content area of D2L, select the second option Permanently delete both the topic from Content and the associated file or activity from the course.
Check the Manage Files area for old and/or unused files
- The Manage Files area of a D2L course can be accessed from the Manage Course dropdown menu, and is where the files of a course are stored.
- Files associated with a Content topic will display a link icon next to them.

- When checking the Manage Files area for old and/or unused files look for:
- Older files that are not in use.
- Zipped files from course and content imports.
- Duplicate versions of files that are not linked to a Content topic.
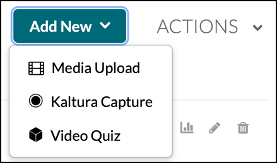
Upload Videos to Kaltura
Videos should be uploaded to Kaltura and not directly into D2L.
- Kaltura is a streaming server which results in better playback for students.
- Videos uploaded to D2L take up course space and are not able to be closed captioned for accessibility.
- Kaltura videos embedded in Content do not count towards the course size limit.
Compress Images in Microsoft Office Documents
Images in Word documents and PowerPoint presentations can take up a significant amount of space, resulting in large files that use up course size and also take longer to download for students.
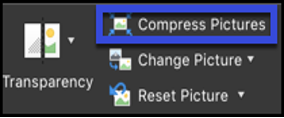
- With the file open in Microsoft Office, select a picture.
- Under Picture Tools, on the Format tab, in the Adjust group, select Compress Pictures.
- To compress all pictures in the document, deselect the Apply only to this picture check box.
- If there are any cropped pictures, the file size can be further reduced by selecting the Delete cropped areas of pictures check box.
- Under Target Output, select the desired resolution, select OK.