
Downloading and Adding Webex Recordings to Kaltura My Media
Instructors are able to download recordings made in Webex and then add them to their Kaltura My Media in D2L, allowing for closed captioning and embedding in D2L courses.
- When inside of a Webex Meeting, launched within a D2L course, select the Record button from the toolbar at the bottom of the screen.
- Next, select the Save to the cloud option to later download as an MP4 file.

- Select Record and conduct your meeting. To stop the recording, select the Record button.
- To download the recorded meeting as a video file, from within a D2L course, select Webex from the Communications menu.
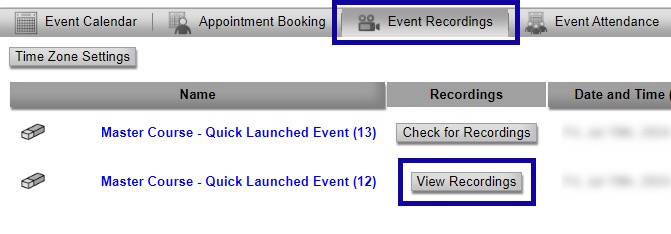
- Next, from within Webex, select the Event Recordings tab, and then select View Recordings for the meeting you wish to view.
- Select the second available link, the one that does not say streaming, to download the recording as an MP4 to your computer.
- Once the MP4 has been downloaded, you may add the file to My Media by returning to the My Home Page of D2L, select the Online Tools menu and then select My Media.
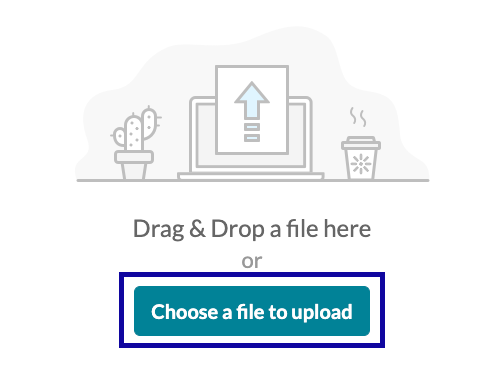
- Within My Media, select the Add New menu and then select Media Upload.
- Select the Choose a file to upload button to navigate to the file on your computer, select the file, and then select Open on a PC or Choose on a Mac.
- Once your file has been uploaded and processed you may review and edit closed captions and then share it within D2L courses.
Note: Do not choose the “Save to my computer” option, as this only records in a proprietary file format that will not be compatible with Kaltura.
Note: The processing of recordings in Webex may take some time.