Creating Media (Video, Screen Capture, Audio) with Kaltura
Creating Media (Video, Screen Capture, Audio) with Kaltura
From the Online Tools menu, located on the D2L My Homepage, select My Media.
Select +Create, then select Capture.
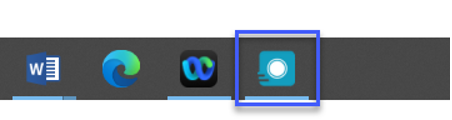
Note: This will launch Kaltura Capture. If you’ve already installed Kaltura Capture, it will launch automatically. Visit Installing Kaltura Capture for instructions.
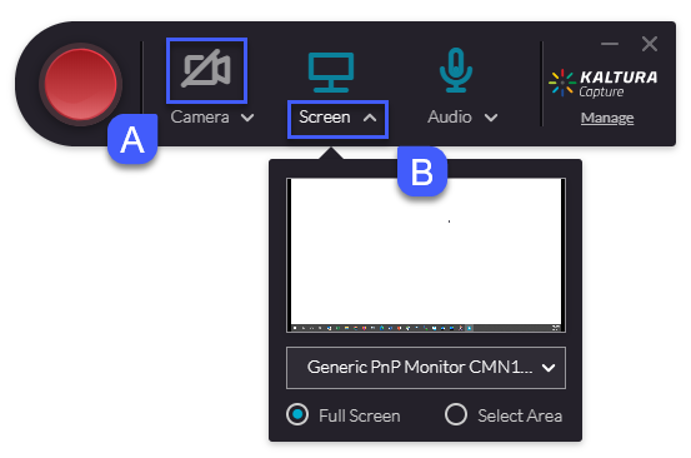
Select the sources for the recording.
Select the Screen, Camera and/or Audio icons to turn on or off.
Note: Sources with blue icons are enabled, while sources with gray icons with a slash are disabled.
Select the menu below the icon to preview and or change the source.
Note: Verify that your webcam and microphone are activated.
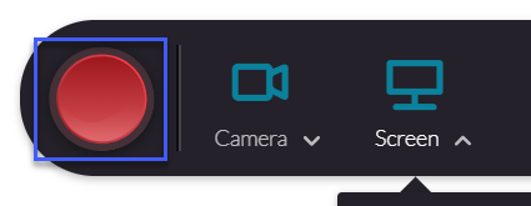
Select Record to begin the recording.
Notes:
Selecting Record will initialize a 3 second countdown
The webcam will begin to record once the when the countdown is finished, even though you cannot see is.
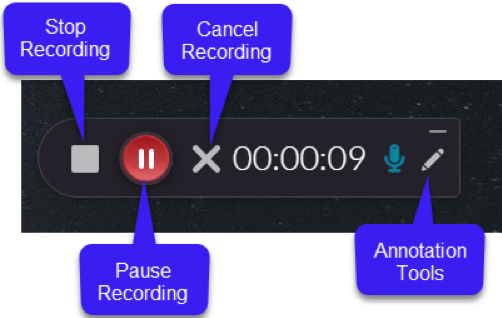
Once the recording begins, the Kaltura Capture recorder menu appears and includes options to Stop, Pause/Resume, or Cancel the recording, as well as use Annotation tools.
Note: If this menu does not appear, select the Kaltura Capture recorder icon from the taskbar on your computer.
When the recording is complete select Stop, then select Yes, Stop it.
Modify the title to more meaningful title (i.e. CHEM100 Chapter 4 Lecture).
Optional: Enter a description and/or tags.
Select Save & Upload to add the recording to your Kaltura My Media.
Notes:
Recordings must be uploaded to Kaltura My Media in order to be embedded into a D2L course.
The file will not appear in My Media until it has been processed by the Kaltura server. The amount of time required to process will depend on the file size.
Uploading is finished only after the URL appears on the entry, even when it states 100%.

 Note: If this menu does not appear, select the Kaltura Capture recorder icon from the taskbar on your computer.