
Creating Checklist Items
IMPORTANT NOTE:
Checklist items must be placed within a Category.
- From the Course Progress menu, select Checklist.
- Select the Name of the checklist.
- Select New Item.
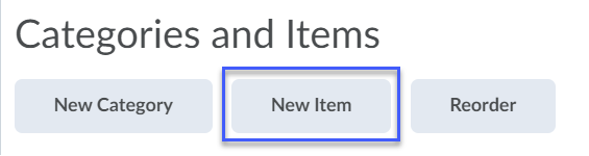
- Select the Category to add the item to from the drop-down menu.
- Enter the Name of the item. NOTE: This is typically “Homework 1” or “Objective 1” as the textbox has a limit on the number of characters you can place in the name.
- Enter the Description. NOTE: This is typically where detailed information is placed such as “My paper uses 3 references.” or “I have completed the Week 4 Reading.”
- If you want the checklist item to have a due date, select the Checkbox next to Due Date and use the calendar and time fields to enter the date and time.
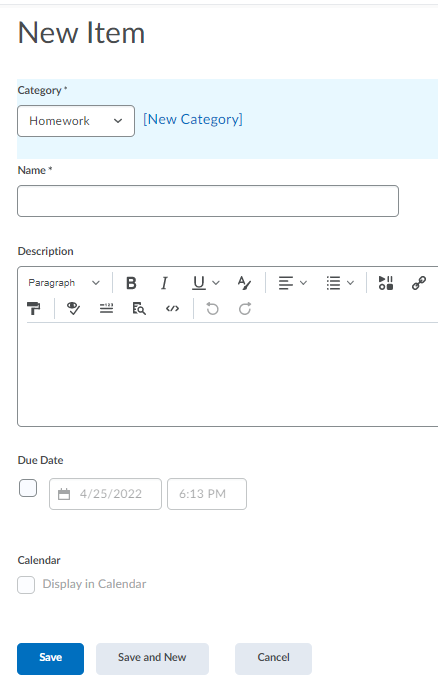
- Select Save.