Creating an Attendance Register and Using Attendance Registers
Creating an Attendance Register and Using Attendance Registers
Select Attendance from the Course Progress drop-down menu.
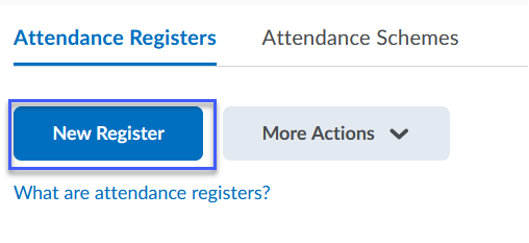
Select New Register.
Enter the Name of the register.
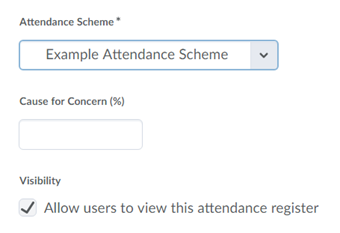
Select an Attendance Scheme from the drop-down menu.
Enter a Percentage for the Cause of Concern level. (Optional)NOTE: When a student’s attendance level drops below the set percentage, a cause for concern icon will appear next to the students name in the register.
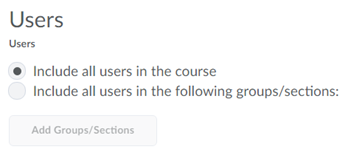
Select the Radio Button for the Users to be included in the register.
NOTE: You can choose to have the register apply to all users, only users in a section, or only users in a specific group.
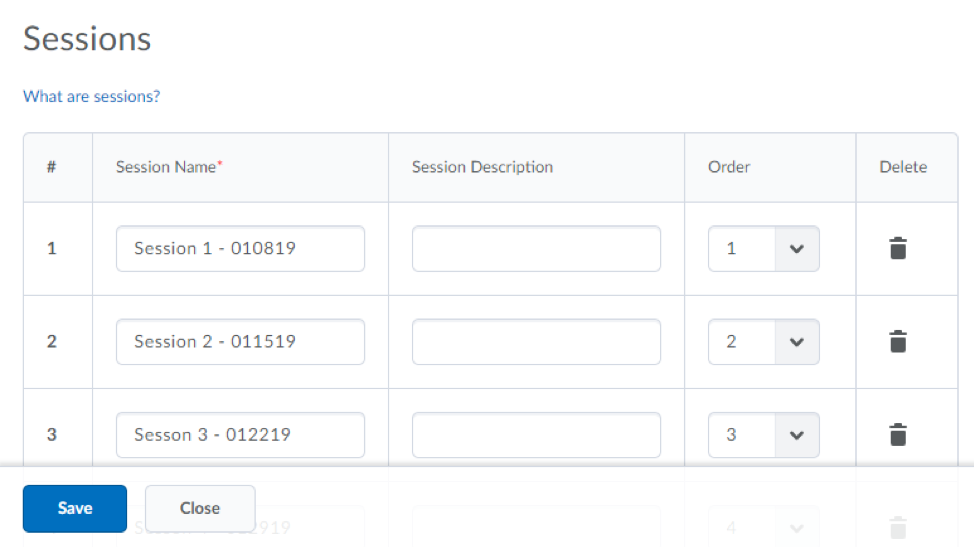
Enter a Name for each Session which should include a six digit date.
To add more sessions to the register, enter the Number for the amount of additional sessions that you wish to add, and then select Add Sessions. NOTE: You must save the register before adding additional statuses.
Select Save.
Select Close.
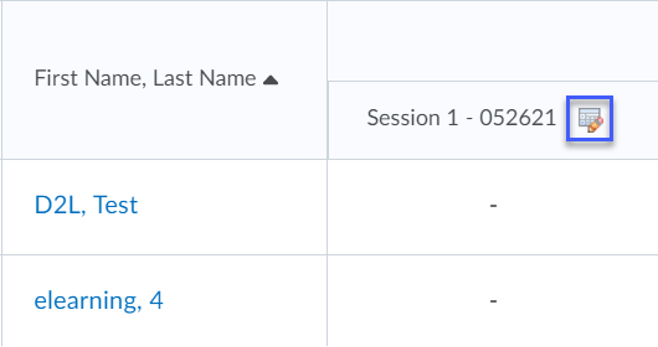
After creating an Attendance Register, select the Name of the attendance register you wish to use.
Select the Enter Attendance Icon for the session you wish to mark.
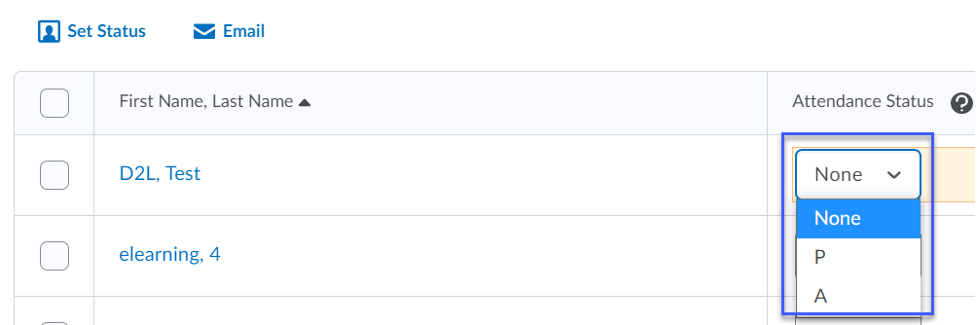
Select the Attendance Status for each user from the drop-down menus.