Create Media with Kaltura Capture
- From the Online Tools menu within My Home page, select My Media.
- Select +Create and select Capture.
Note:
This will launch Kaltura Capture. If Kaltura Capture is already installed, it will launch automatically. Visit Install Kaltura Capture for instructions.
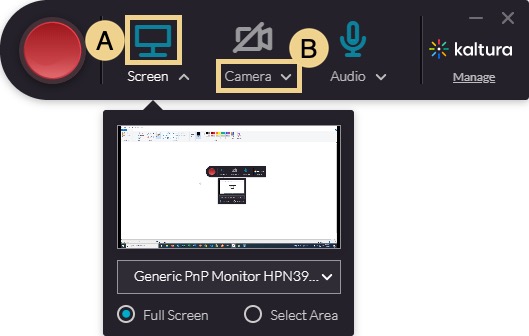
- Select the following sources for the recording:
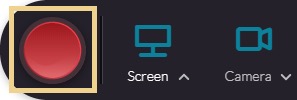
- Select the Screen, Camera and/or Audio icons to turn on or off.
Note:
Sources with blue icons are enabled, while sources with gray icons with a slash are disabled.
- Select the options below to preview and/or change the source.
Note:
Verify the webcam and microphone are activated.
- Select the Screen, Camera and/or Audio icons to turn on or off.
- Select Record to begin the recording.
Note:
Once the recording begins, the Kaltura Capture recorder menu appears and includes options to Stop, Pause/Resume, or Cancel the recording, as well as the Annotation tools.
- When the recording is complete, select Stop, and select Yes, Stop it.
- Modify the title (i.e. CHEM100 Chapter 4 Lecture).
- Select Save and Upload to add the recording to Kaltura My Media.
Notes:
- Recordings must be uploaded to Kaltura My Media in order to be embedded into a D2L course.
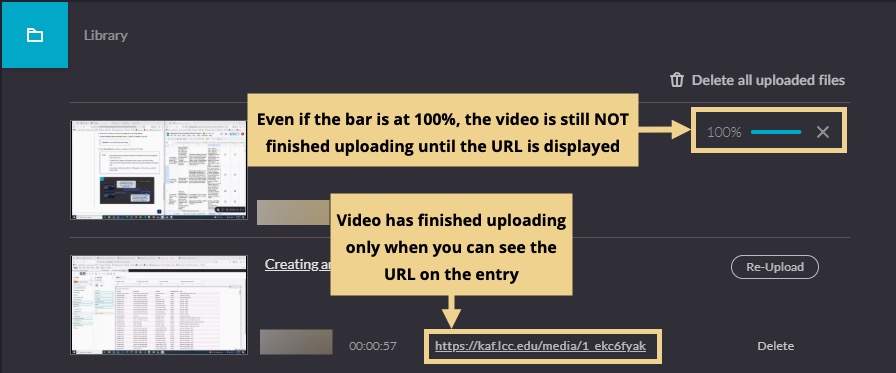
- The file will not appear in My Media until it has been processed by the Kaltura server. The amount of time required to process will depend on the file size.
- Uploading is finished only after the URL appears on the entry, even when it states 100%. Select Save and Upload to add the recording to your Kaltura My Media.