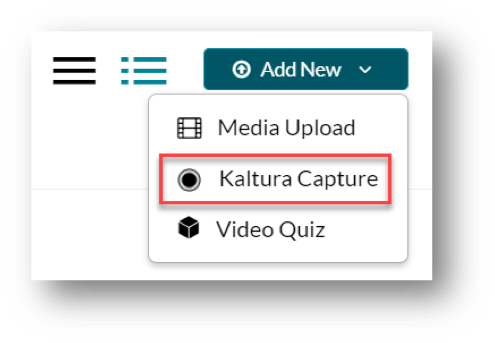
Select Add New, then select Kaltura Capture.
NOTE: This will launch Kaltura Capture. If you’ve already installed Kaltura Capture, it will launch automatically. Visit Installing Kaltura Capture for instructions.
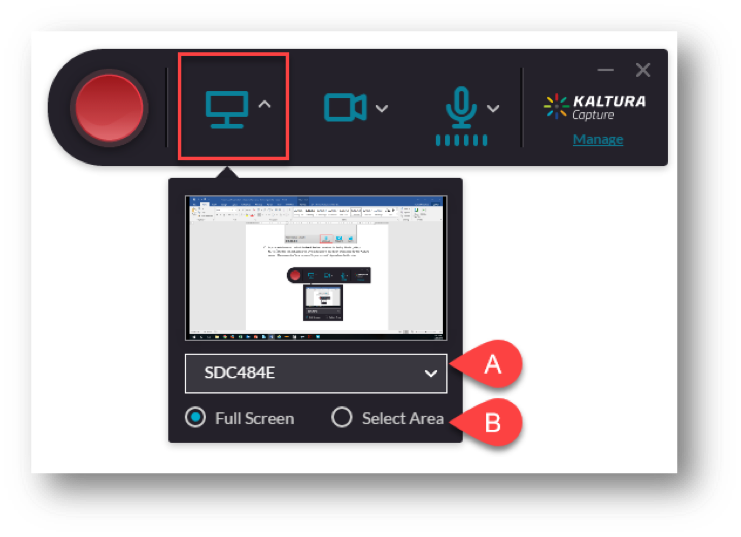
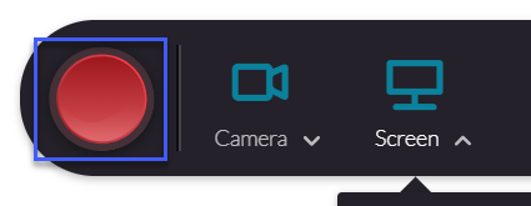
From the Screen drop-down menu (arrow), select the screen(s) to capture.
Select screen(s) to capture: From the drop-down menu, select the screen you wish to record.
NOTE: If you only have one monitor only one screen will appear.
Select area to capture: Select the area to capture Full Screen or Select Area:
Full Screen allows you to capture the entire screen
Select Area allows you to capture a specific area of the screen.
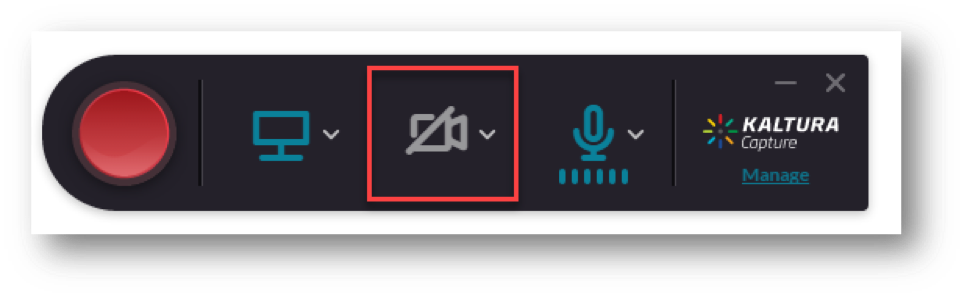
Turn off the Webcam by selecting the Webcam icon.
Note: The Webcam has been successfully turned off when the strikethrough line appears.
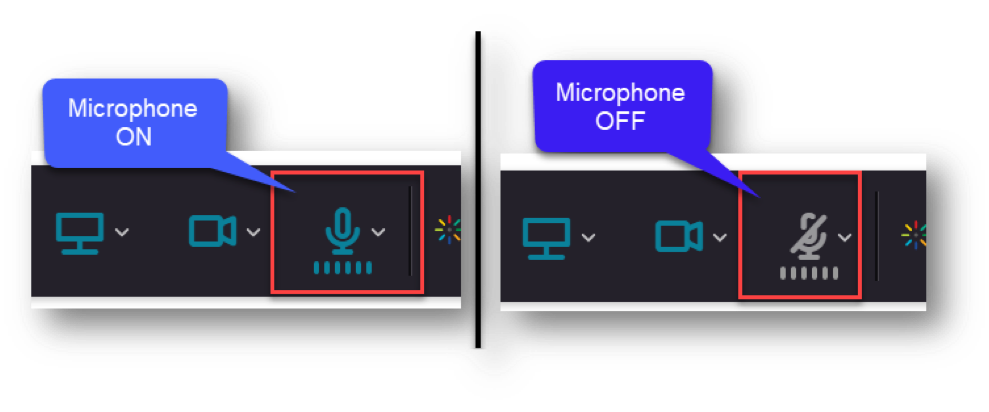
Verify the Microphone is on, and the volume is turned up.
Select Record to begin the recording.
Note: Selecting record will initialize a 3 second countdown.
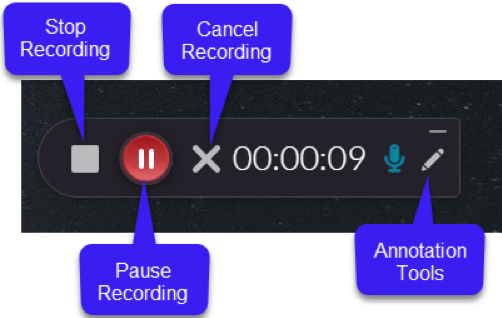
Once the recording begins, the Kaltura Capture recorder menu appears and includes options to Stop, Pause/Resume, or Cancel the recording.
Note: If this menu does not appear, select the Kaltura Capture recorder icon from the taskbar on your computer.
When the recording is complete:
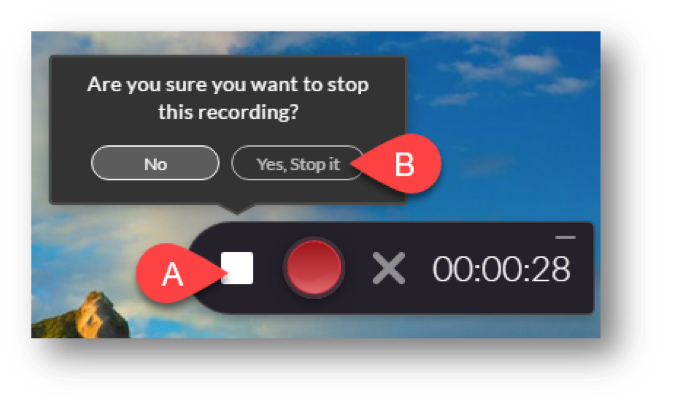
Select Stop.
Select Yes, Stop it.
Modify the Title to a more meaningful title (i.e. CHEM100 Chapter 4 Lecture).
OPTIONAL: Enter a description and/or tags.
Select Save & Upload to add the recording to your Kaltura My Media gallery.
Notes:
Recordings must be uploaded to the Kaltura My Media gallery in order to be embedded into a D2L course.
If you select Save, instead of Save & Upload, your recording will be saved in the Kaltura Capture Library.
The file will not appear in My Media until it has been processed by the Kaltura server. The amount of time required to process will depend on the file size.
Select New Recording to begin another recording, or select the X to close the window.


 Note: If this menu does not appear, select the Kaltura Capture recorder icon from the taskbar on your computer.