Creating Assignments
To learn about Linking to Grade Items, view Linking to Grade Items.
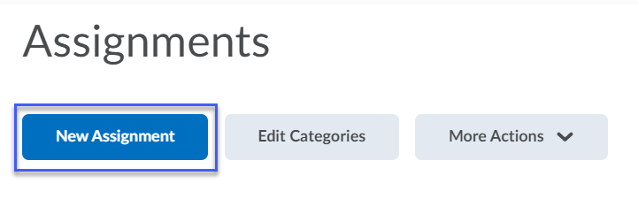
- From the Assessments menu, select Assignments.
- Select New Assignment.
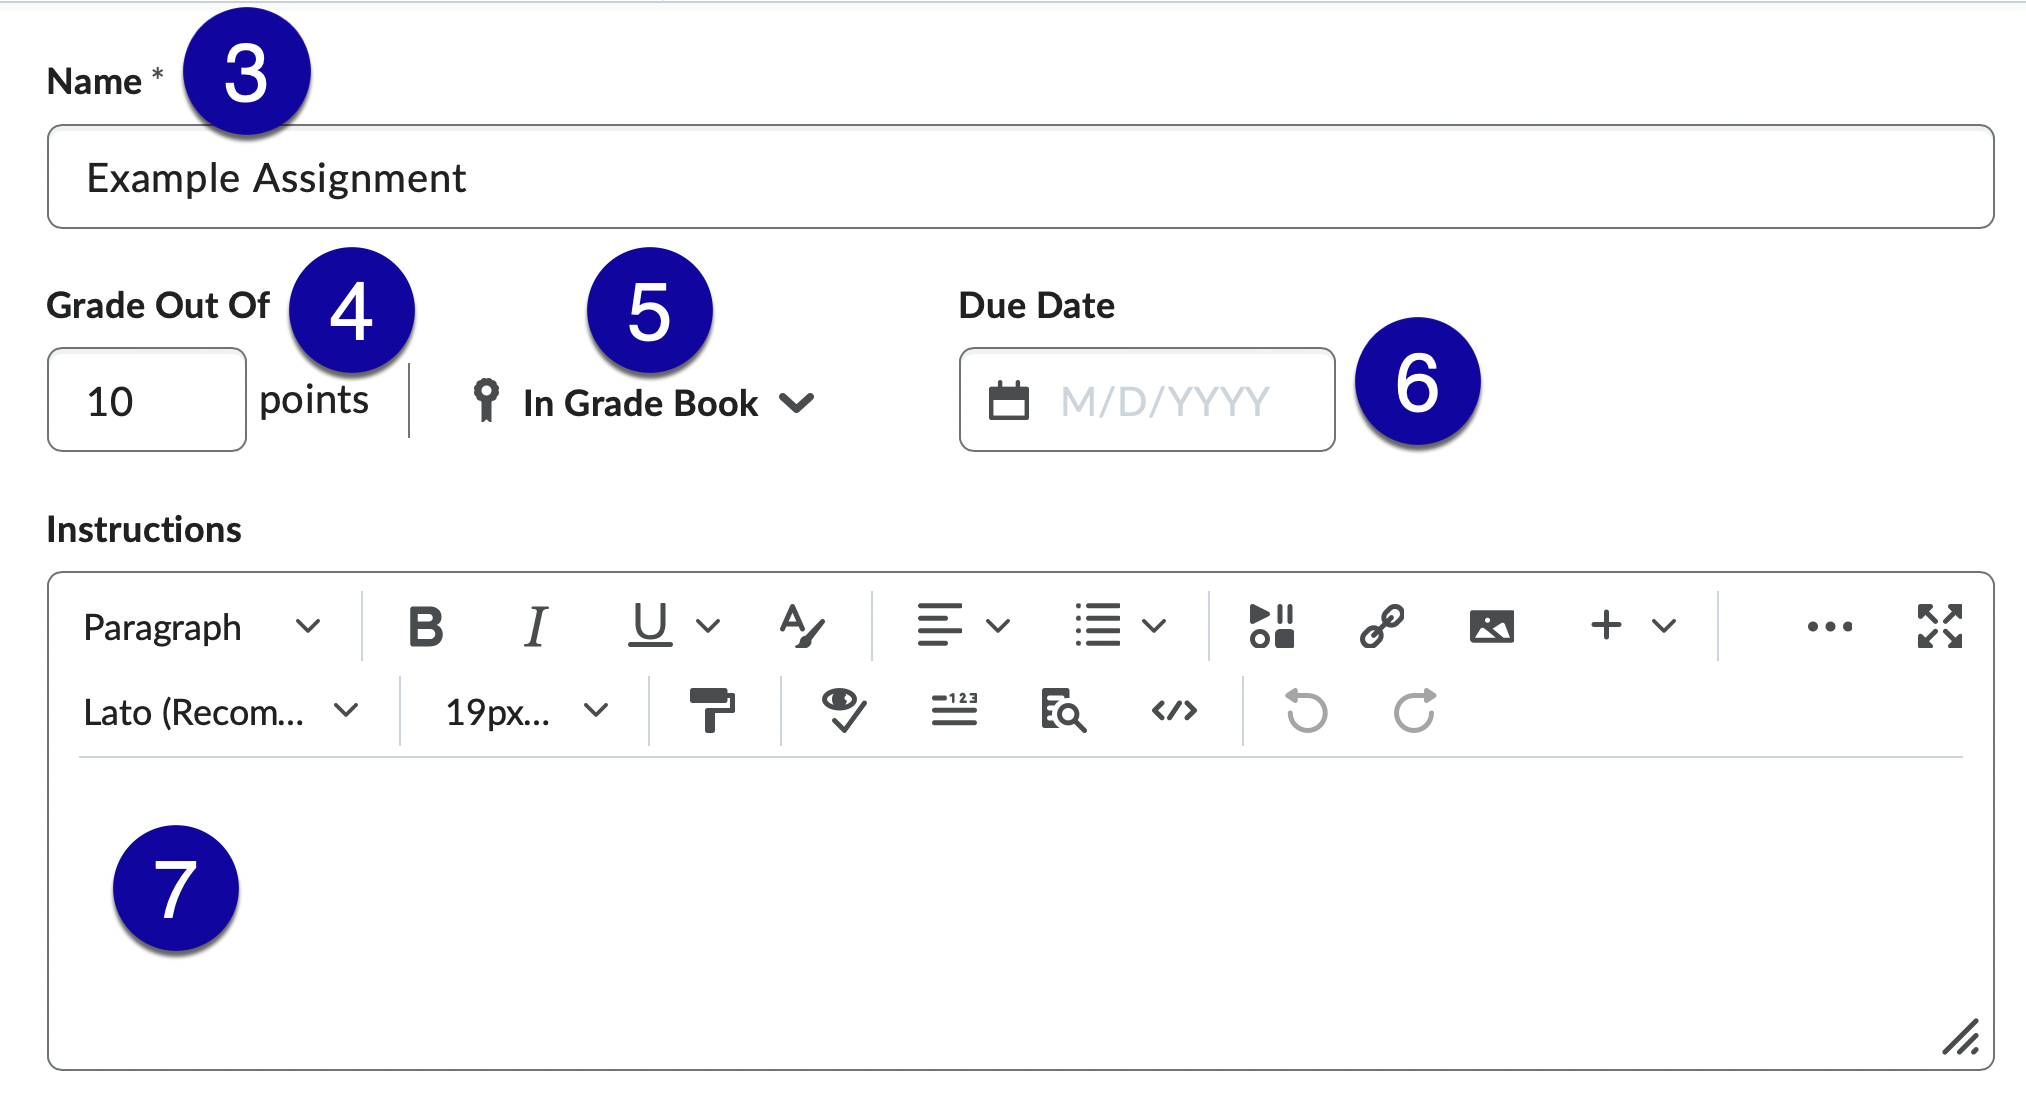
- Enter the Name of the New Assignment. BEST PRACTICE: Using a unique name for each Assignment will help to cut down on potential student confusion and ensure that projects are submitted to the proper folder.
- Enter the total number of points possible in the Score Out Of text field.
- To associate the assignment with the gradebook, select the In Grades menu, then:
- Edit or Link to Existing: Allows users to choose a grade item from the gradebook or will create a new grade item
- Not in Gradebook: No connection to a grade item
- Reset to Ungraded: Makes the assignment an ungraded assignment
- Enter a due date and time, if desired.
- Enter Assignment Instructions in the Instructions text field.
- Within the Availability Dates and Conditions menu:
- Set Start and End Dates (optional).
- Set Release Conditions (optional).
- Set Special Access (optional).
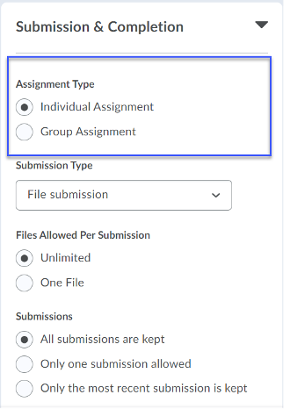
- Within the Submission & Completion menu, select the Assignment Type:
- Individual Assignment: Users submit their own files and are assessed individually.
- Group Assignment: Any member of a group can submit files to a group folder. Group members are given a common grade. NOTE: To select the Group Assignment option, groups must already be set up in the course before creating the Assignment.
- Select the Submission Type. Types are File submission, Text submission, On paper submission or Observed in person.
- Within the Evaluation & Feedback menu:
- Add Rubric(s) (Optional)
- Manage Learning Objectives (Optional)
- Select Save and Close.